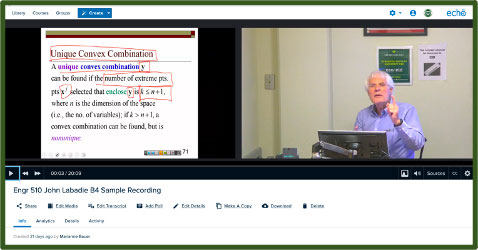
Faculty: On-Campus Recording Using Echo360-Enabled Rooms
Echo360 Courses and Sections
All CSU Courses appearing in the ARIESweb (Banner) registration system automatically have an Echo360 Course created. After you create a section, the assigned professor will become the primary Echo360 instructor. Please make sure the registrar has any changes you make to courses, sections, room assignments and primary instructors so the system will reflect the appropriate changes made. These need to be made as soon as possible, preferably before students register. Contact the registrar through your department liaison.
Echo360 Recording Schedules
- Please see Menu > Faculty > Create/Manage Echo360 Sections, Schedules and Recordings to create your sections and recording schedules.
Steps for Recording in an Echo360 Classroom
As CSU approaches 200 classrooms enabled with Echo360 capabilities, faculty are finding that recording their lectures are a valuable asset to their Canvas Courses. To record in an Echo360 room:
- Turn on the Crestron AV System and select an input for screen capture, (NOTE: Whatever is sent to the projector is typically what is captured in Echo360.
- Lectern PC
- Laptop device plugged into the system
- Document Camera
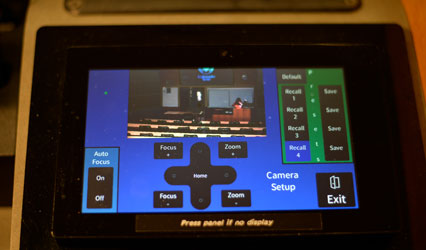
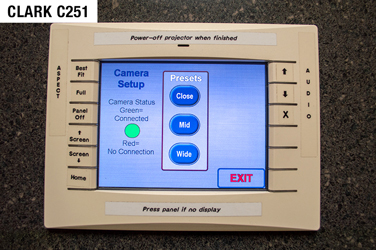
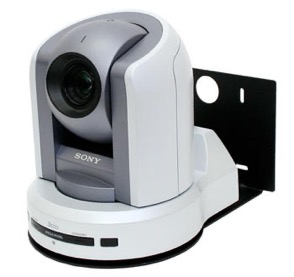
- Find the Camera Control button on the Crestron AV System Monitor, and select a camera shot
- Tight – Close up framed shot of lectern
- Medium – Wider shot to include around lectern area
- Wide – Entire front of classroom, includes front few rows of student seating
- Some rooms offer pan (left, right) tilt (up, down) and zoom (close, far) capabilities.
- Locate the mic
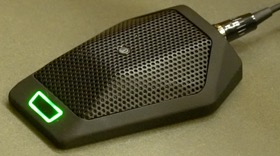
- Most rooms have a Boundary Mic located somewhere on the Podium. Please stay within five feet of the mic for best audio quality. Stand behind podium or to one side. When a boundary mic is present, any other mic is for "voice lift" only, to help amplify a voice through the PA system. It does not record to Echo360.
- If only the Belt Pac Shure type mic in the charging cradle is present, put on the belt pac and clip the lapel mic to the middle sternum or chest area. In the absence of a boundary mic, use this mic to record for Echo360. If the PA is needed, don't turn up too high.
- A few rooms have ceiling mics. Nothing to turn on or off here.
Faculty, you are now ready to teach your course.
Important: To ensure privacy when having a private conversation where a lecture recording has been scheduled automatically, you should either turn off or mute (light turns red) the classroom microphone, or physically step away from the podium.
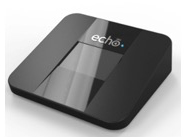
Pod (Recording Device)
Lectures will be recorded on the Echo360 Pod device installed in the lectern. These are not for faculty use, so don't ever touch, plug, or unplug anything. They remain inside the lectern and store all recordings for up to two weeks. When the scheduled recording finishes, it automatically uploads for processing and storage on the web. Nothing is stored locally here on campus at CSU, except the POD recordings that stay in the Pod for two weeks as backups, then get erased over.
Microphones
Most Echo360-equipped classrooms now have a microphone permanently installed in each room.
Boundary Mic: You are recorded from a boundary mic installed and sitting on the lectern. You must stay within about 5 feet for the best quality audio quality for Echo360 recordings.
Lights: A red light means the Boundary mic is muted. A green light means it is ready to record. Press the button to turn it to green if necessary. Leave it on green when finished please.
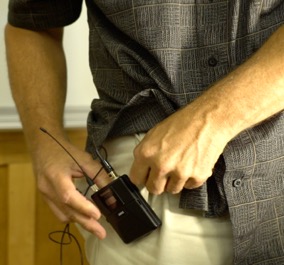
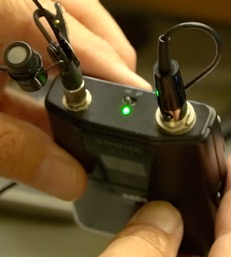
Lavaliere Mic/Belt Pac: A few rooms still only have the Lavalier/Belt Pac type mic.
- Clip on outside of a pocket or belt.
- A green light must be on to record in Echo360.
- Be gentle with the cords. Never bend or wind them. Leave them loose on the surface of the lectern.
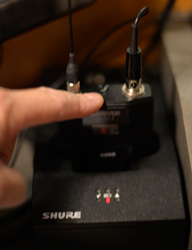
Red light indicates mic is charging.
Charging Cradle: These microphones will typically be located in a charging cradle located on the lectern.
- The mics in the charging cradles for the most part are now for voice lift only.
- When done, switch off the mic, place it in the charging cradle facing forward, and press firmly.
- The red light should turn on, indicating the mic has started charging for next user.
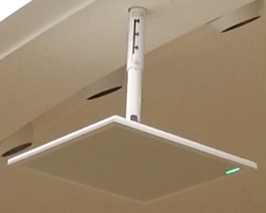
No Boundary or Lav mics present? Look up.
Ceiling Mic: In Clark A206, ENGRG B2, ENGRG B4, VTH A221, and VTH B213, each has a microphone system permanently mounted in the ceiling. A clip-on lavaliere microphone is not needed when recording in these classrooms.
Mic Checkout: Most rooms no longer require you to check out a microphone prior to class. However, there are a few exceptions.
- When using CHEM A101 and CHEM A103, you must check out a microphone prior to each class from the Chemistry Department office.
If a microphone is missing, call the Morgan Library Help Desk: (970) 491-5920.
